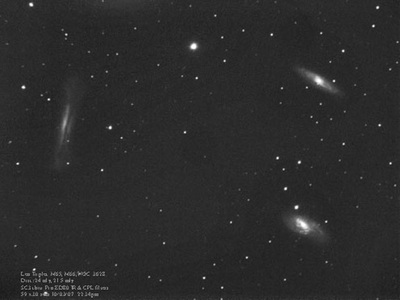
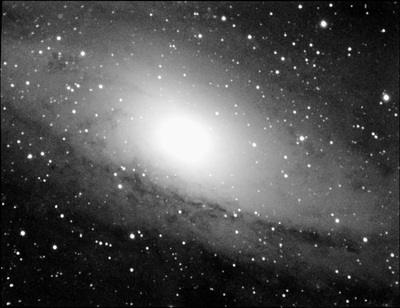
This was great, I could see M51 on my computer screen, M81,82, 27 & 57, galaxies that I had read about but I never thought I would see images that I had taken, on a screen in front of me.
This is when I noticed, you stop looking up at the night sky, when you start imaging, because you are always looking at the computer screen, you cease to be an observer. You have to be careful not to lose sight of the astronomy, of the ultimate subject that anyone could be interested in, only to replace it with a photograph, very easy to do, as imaging becomes addictive.
So I was now using a modified webcam, laptop & an ED80 telescope, for deep sky & the capture programme, K3CCD.
Now I warn you, if you value your sanity or have a good head of hair, & do not want to lose both, sanity & hair, do not go past this point!!!!!
After a while, I decided that my images were nowhere as good as someone’s who was doing much longer exposures, up to 15 minutes. Problem was, I would have to learn to guide.
Oh dear, dissatisfaction was setting in. More money to find, more programmes to learn. This would test my enthusiasm. I realised I would have to have the patience of Job to stay the course.
|
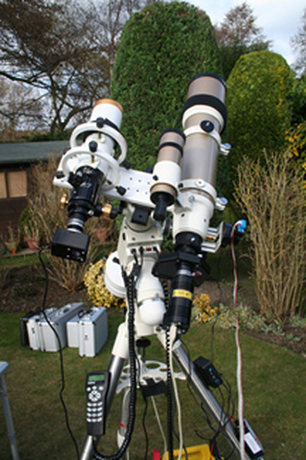
No longer happy with my results, I bought a Starlight Xpress M7, a dedicated mono ccd camera, a WO ZS66, FL 388mm, F5.8 telescope, as a guide & imaging scope, a GPUSB Shoestring, to control the guide pulses to the mount & had to learn a few more programmes.
Now I was using, a modified webcam with a WO ZS66, to guide with either the programme K3CCD or PHD, with a GPUSB Shoestring to control the mount, for guiding, an SX M7 with the ED 80, for capturing the image via the programme Astroart. Depending on the subject I have chosen, I switch the camera’s & scopes around, & if the subject is large, like most of the nebulae, will use the ZS66, as it has a wider field of view than the ED80. If an even wider field of view is needed, a focal reducer can be attached, to either scope. |
Before you can start anything, you have to align the scope to Polaris & choose 1-3 alignment stars, so the mount knows where it is going in relation to these positions.
A guide star is selected with the webcam whose program is then set up to take constant images of around 1 second, or more if the seeing is not so good. The aim is to keep the selected star within the guide box, or in the centre of the cross hairs, on the guide programme, which will enable the imaging camera to take a series of subs, usually between 300- 600 seconds, & keep the subject in the same position so there is no drift, which would cause elongated stars to occur.
Then the problems started. Guiding was not too good, could not find the subject as my mount was not accurately polar aligned. This was causing drift in the image!
You can sit outside for hours & have programmes not working properly, clouds, moisture, bad polar alignment. This can go on night after night, especially when first learning the various programmes, in fact, it still happens now, as you never stop learning & don’t often seem to get it completely right!
You get all the equipment out & then put it all away at the end of the night, with nothing to show for it. And if it has been damp, you have to leave everything inside but with lids open to dry off the dew, as the equipment is too expensive to put away covered in moisture.
It is a lonely hobby, at times, when you sit alone in the garden, usually cold, with plenty of damp to mess up the imaging & give a foggy image, after hours of sitting & watching the paint dry.
I don’t like to go indoors for too long as usually something happens at that time, & you come outside again to a wasted 300 secs exposure because clouds have come over, a plane or satellite has passed thru, or more than likely, the guiding has gone wrong.
You need to take as many subs as possible to get a good signal to noise ratio. You may decide to take only Luminance, clear filter, mono subs, & to deduct any camera noise in the image you need to take Darks, around the same time as the Luminance & for the same exposure time.
This is done by covering the end of the scope with a cap & eliminating all light to the chip.
Then often there is dust on one of the filters which causes black circles on the image, or you get vignetting, where the centre of the image is lighter than the edges. To eliminate these two problems, Flat frames have to be taken, by exposing the chip to an even light source & taking around 20 subs amounting to, roughly, just under half the adu of the camera, which is unit of measurement of the pixel values of the camera. In my case this is 0.5 seconds taking the subs to around 28,000 adu, just to the left of the centre of the histogram.
Then identical subs, called Dark Flats, taken with the cap on have to be taken. The Luminance, darks, flats & flat darks are then put into a processing programme which will usually handle the stacking & star alignment, subtract the dark frames from the Luminance & divide the Flat frames into the Luminance, automatically, & so sorting out any of the the above problems in the image.
Once you have acquired and stacked the image, it has to be processed. Usually in a programme like PhotoShop, which takes a lifetime to learn on it’s own. I think I will have to be buried with a Photoshop manual, it will keep me occupied for eternity!!
Wait for it…………….
If you want coloured images, you are supposed to repeat the above with first a Red filter, Green & then a Blue, you don’t have to take as many as the Luminance sequence, but all should have their own Dark, Flat & Flat dark frames.
If you want to bring out the hydrogen in a nebula, then instead of a Luminance, clear filter, you would use a Hydrogen alpha filter.
There are other filters that will bring out different elements in deep sky objects.
You could also use, for example, a Canon 350D DSLR. I had mine modified, which now gives it more sensitivity to hydrogen light. A good option, as the images are already in colour, & the chip is really large. I also have a larger chip ccd camera, an Atik 314L.
Then a lot of the time, after all this palaver, you are not happy with the result, the subject is “pending”, in a corner of your mind, which means you cannot put this away you will have to try & improve on it at a later date. This “pending folder” does tend to get rather crowded! A lot more crowded than the completed & satisfied folder!
Now, if you are not faint hearted, and you decide to follow me, & others, on this journey, don’t get despondent, listen on.
Because, one night…………… after you have been standing in the cold & damp, possibly, for the 10th time, getting negative results, you will look on your screen, & will see something wonderful.
It will fulfil your dreams of what you have been trying to achieve, & will not have to be put into that “pending” folder.
It will be the ultimate capture, within the capabilities of yourself & your equipment.
And at that moment, that one image will have made all the, learning, watching, reading, listening, spending, worthwhile.
And, when that night happens, & it will, don’t forget, you will owe it to the night sky to look up ……….& remember, that is why & how your journey began.
